


What if you could install your own DIY Budget Sprinkler System in under an hour and for less than $300.00 bucks featuring commercial grade products? That is exactly what this article is about. It is about finding the middle ground between dragging a hose around your yard and forgetting to turn off your faucet to a professionally installed system that can cost in excess of $3000.00.
So what’s the downside?
The main downside is that the system will be above ground, however, most of the components can be buried if you would like to.
You will not be able to put as many sprinkler heads on a zone or section as a commercially installed system. Unlike commercially installed system this system will not be supplied by its own water source, instead, it will be supplied by a water faucet and controlled directly by a timer.
As a result, I have sacrificed coverage at the expense of money. In a professionally installed sprinkler system, there is even coverage throughout your landscape. I did not do this, I wanted a quick and easy solution that would cover 90% of my yard.
Budget Sprinkler System Key Features
Professional Grade Products that are reliable.
Since the system will be operating on a timer without me watching or paying attention. I want the components to be reliable and robust. I do not want to worry about a sprinkler head not spraying where it is supposed to for an hour while the system runs. I also do not want a pipe broke shooting water all over the place.
Quick and easy
I do not want to spend all day installing it. I want to unpack the box, put it together, hook it up to the water, and turn it on. I also do not want to buy a bunch of specialty tools, glues, or wiring. I want to plug it in and go. After all, a DIY Sprinkler System is not DIY if you have to call a plumber to tap into a pipe right?
Option to bury the pipes later
When I get time I would like to bury the sprinkler pipes in my yard without having to buy all new materials or worry about them leaking when I do get around to burying them.
Budget Sprinkler System Overview
This sprinkler system will be installed above ground initially, supplied by water from a faucet that is attached to a fully programmable timer. A garden hose will be attached to the timer and ran over to the first sprinkler head, from there it will transition over to flex pipe (also known as swing pipe or funny pipe) then it will continue to additional heads.
I chose to use the garden hose out of the timer due to the fact that the hose will be running across my driveway and I may need to move it from time to time. Let’s face it rolling up a hose is easy, rolling up pipe… ya not so much.
That’s it, sounds easy right?
The Water Source
First off let’s eliminate the major cost of a sprinkler system, the water source, controller, and infrastructure by installing a stand alone irrigation controller. This one single device contains the wiring, the control valves, the controller, it does not require any additional power sources, and best of all it is easy to install.
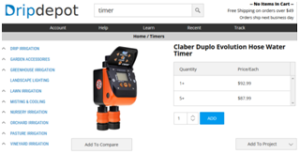
Timers like the one on the left, attach directly to your outside faucet and can be programmed to water automatically. No more leaving the hose on at night and taking a vacation only to return to dead plants. Simply hook it up to your faucet, program it, and place your sprinklers. It’s really that simple.
Obviously, these timers do not have all the same features of a professionally installed system. Such as setting individual dates to water and not water, adjusting watering percentages and smart home functionality. However, you will save so much more in the way of money while being able to set up an automatic schedule that you don’t have to worry about. As an added bonus you can add a rain sensor to this model. No one needs to be watering their lawn during a thunderstorm right?
Additional Items to Consider
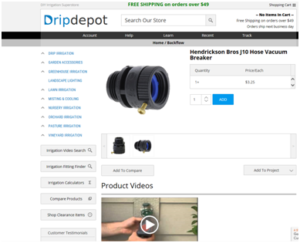
Before attaching the timer to your faucet you will need to make sure you have a backflow device on your faucet. This prevents water from the sprinklers from going back into you’re your home in the event of a water main break. In fact, all new homes already have these installed.
The feature I like the most about these controllers is that anyone can install them. The just screw onto your faucet on one side and your garden hose hooks up to the other side. No fancy tools, expert knowledge or fancy specialty fittings.
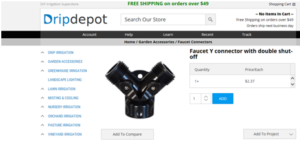
By installing a Y adapter on your faucet. You can use it to water your turf, plants, vegetables, and flowers. All with the same controller.
With the advent of the small “cookie cutter” homes, you no longer need an excessive amount of heads to water your lawn. Average size front yards can get away with 6-8 heads total. This is exactly what I found with my own home.
So what key features should you look for when purchasing a Faucet Timer?
If you are planning on watering more than one area, you should look for the ability to program each zone independently
For example, if you have a wide open area with rotor heads in it and a small narrow area with spray heads. You do not want them both running for the same amount of time. If both areas share the same features such as head type, sun requirements, and landscape type then you surely can program them the same.
If you would like more information on layout and design take a look at my other article found here.
The next key feature is a set of detailed list of instructions. The last thing I want to do is buy something then spend an hour on google trying to figure out how to use it.
While programming is very simple, if you have no experience with a sprinkler system, some of the terms and features will not make sense. This is why I like the Drip Depot the give you the option to download and view the manuals before you purchase their items.
Amazon also has a wide range of timers, with numerous options.
If you are only watering one area, you can opt for a simple single station timer like this one, simply turn the dial to one of the preset programs and walk away. This is especially good for vegetable gardens and drip systems.
That’s great, but the title is Budget Sprinkler SYSTEM, not Faucet Timer!
Now that we have the water source and controls sorted out we will need to identify what type of heads we want to use and how we want to connect them. For my system I chose to go with commercial grade pipe, that can later be buried, or bury it as I have time
The tricky part to this is the fact that pipe threads are different from garden hose threads, therefore we will need to convert them. So out of my faucet timer, I attached a garden hose and ran that to the first sprinkler head where I will transition over to the standard pipe threads.
This will allow me to easily unhook the garden hose as necessary and move it around when it is not being used. This is especially important since it will be running across my driveway.
Once the garden hose reaches the 1st sprinkler head I will begin my transition. At this point, I used a head spike to not only attach the sprinkler head, but it also provides the sprinkler head support so it does not lean over. Unfortunately, the head spikes are made to be used with garden hoses and not pipes, so depending on how many you are using, you may need to transition back and forth multiple times.
Not too big of a deal, but it would have been easier if it was standard pipe threads.
As for the kind of pipe I chose to use, I went with Flex Pipe. Flex Pipe generally used in all sprinkler systems and is widely available, durable, and is made to be a direct burial. It is also easy to install and only costs about $30.00 per 100 feet.
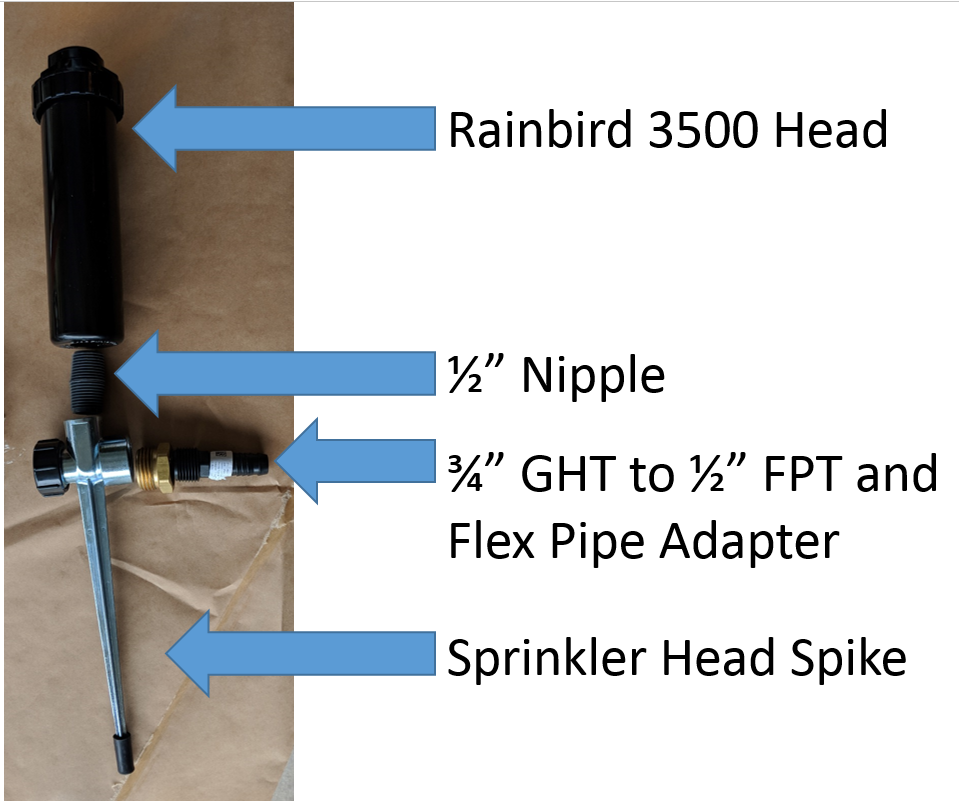
For sprinkler heads, Rainbird 3500 sprinkler heads. They are slightly smaller than the Rainbird 5000, with the advantage of having a 1/2″ connection on the bottom of the head as opposed to a 3/4″. This will match up perfectly wiht the head spikes since they are also 1/2″
For a more in-depth explanation of why I chose Rainbird heads you can take a look at my other article 5 Key Features Of The Best Pop Up Sprinkler Head
Putting the Budget DIY Sprinkler System Together
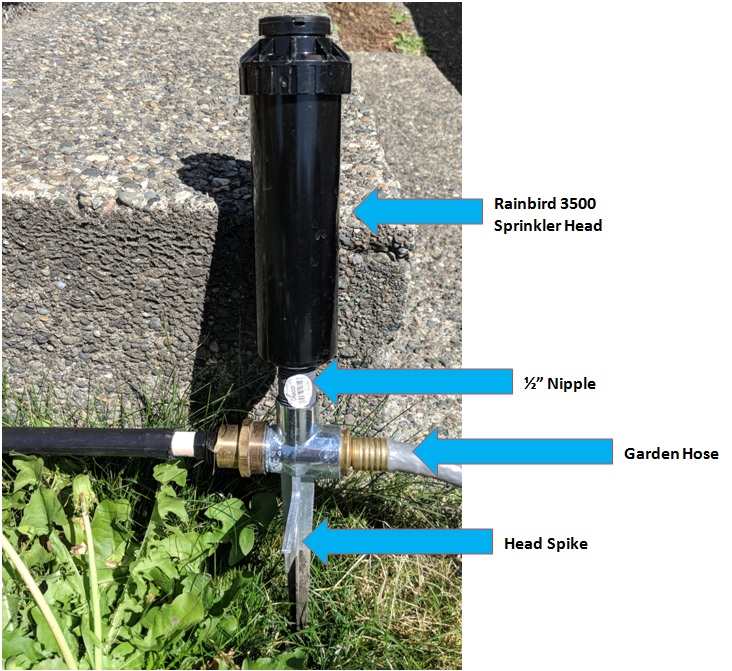
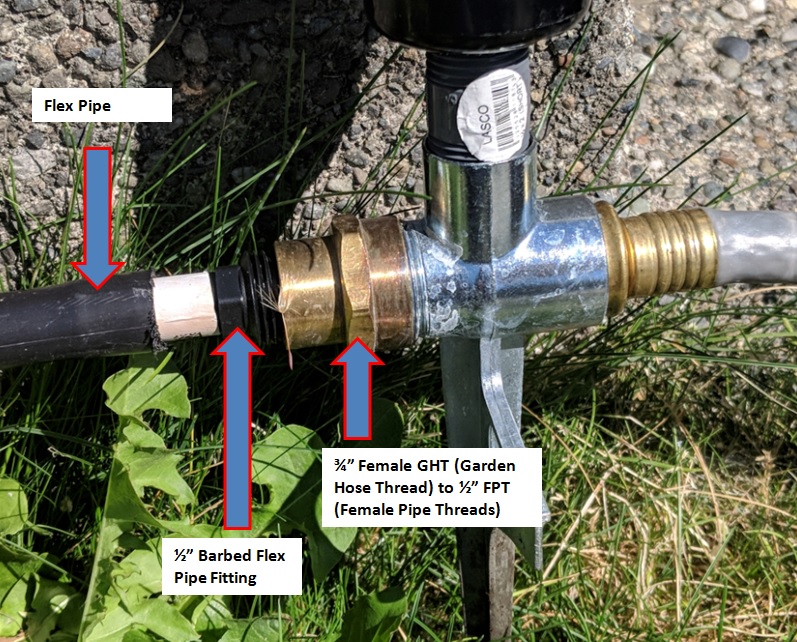
Here is the first head on one of the zones. The garden hose attaches on the right side, enters the head spike, attached to a 1/2″ nipple, and the Rainbird 3500 sprinkler head is mounted on top. On the other side, there is a transitional plumbing fitting that goes from 3/4″ FGHT (Female Garden Hose Threads) to 1/2″ FPT (Female Pipe Threads), attached to a 1/2″ barbed Flex Pipe fitting, and finaly the Flex Pipe.
Flex pipe then runs over to the next head, where the same thing happens, as seen below:
As you can see, there is a cap where the garden hose would normally attach. Since I am only installing 2 sprinkler heads on this zone, I will leave it capped off.
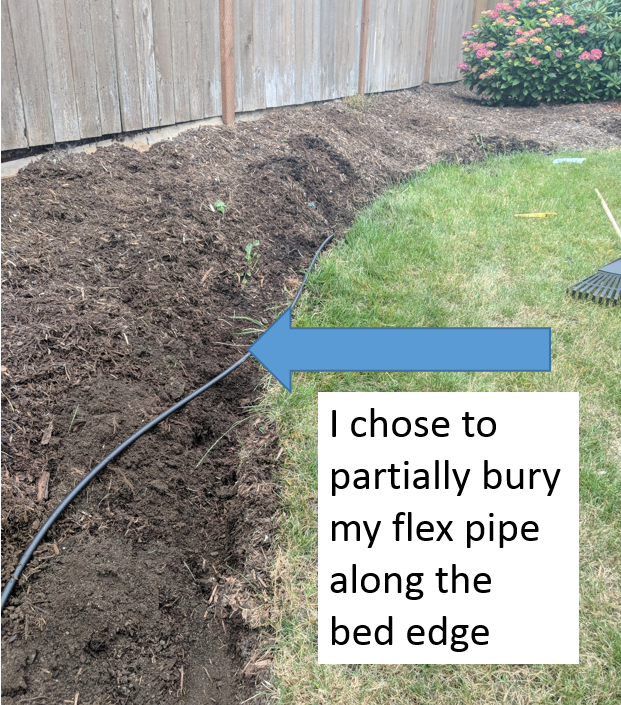
Luckily, I had a flower bed that ran the length of my yard, so I used the bed edge to hide some of the Flex Pipe.
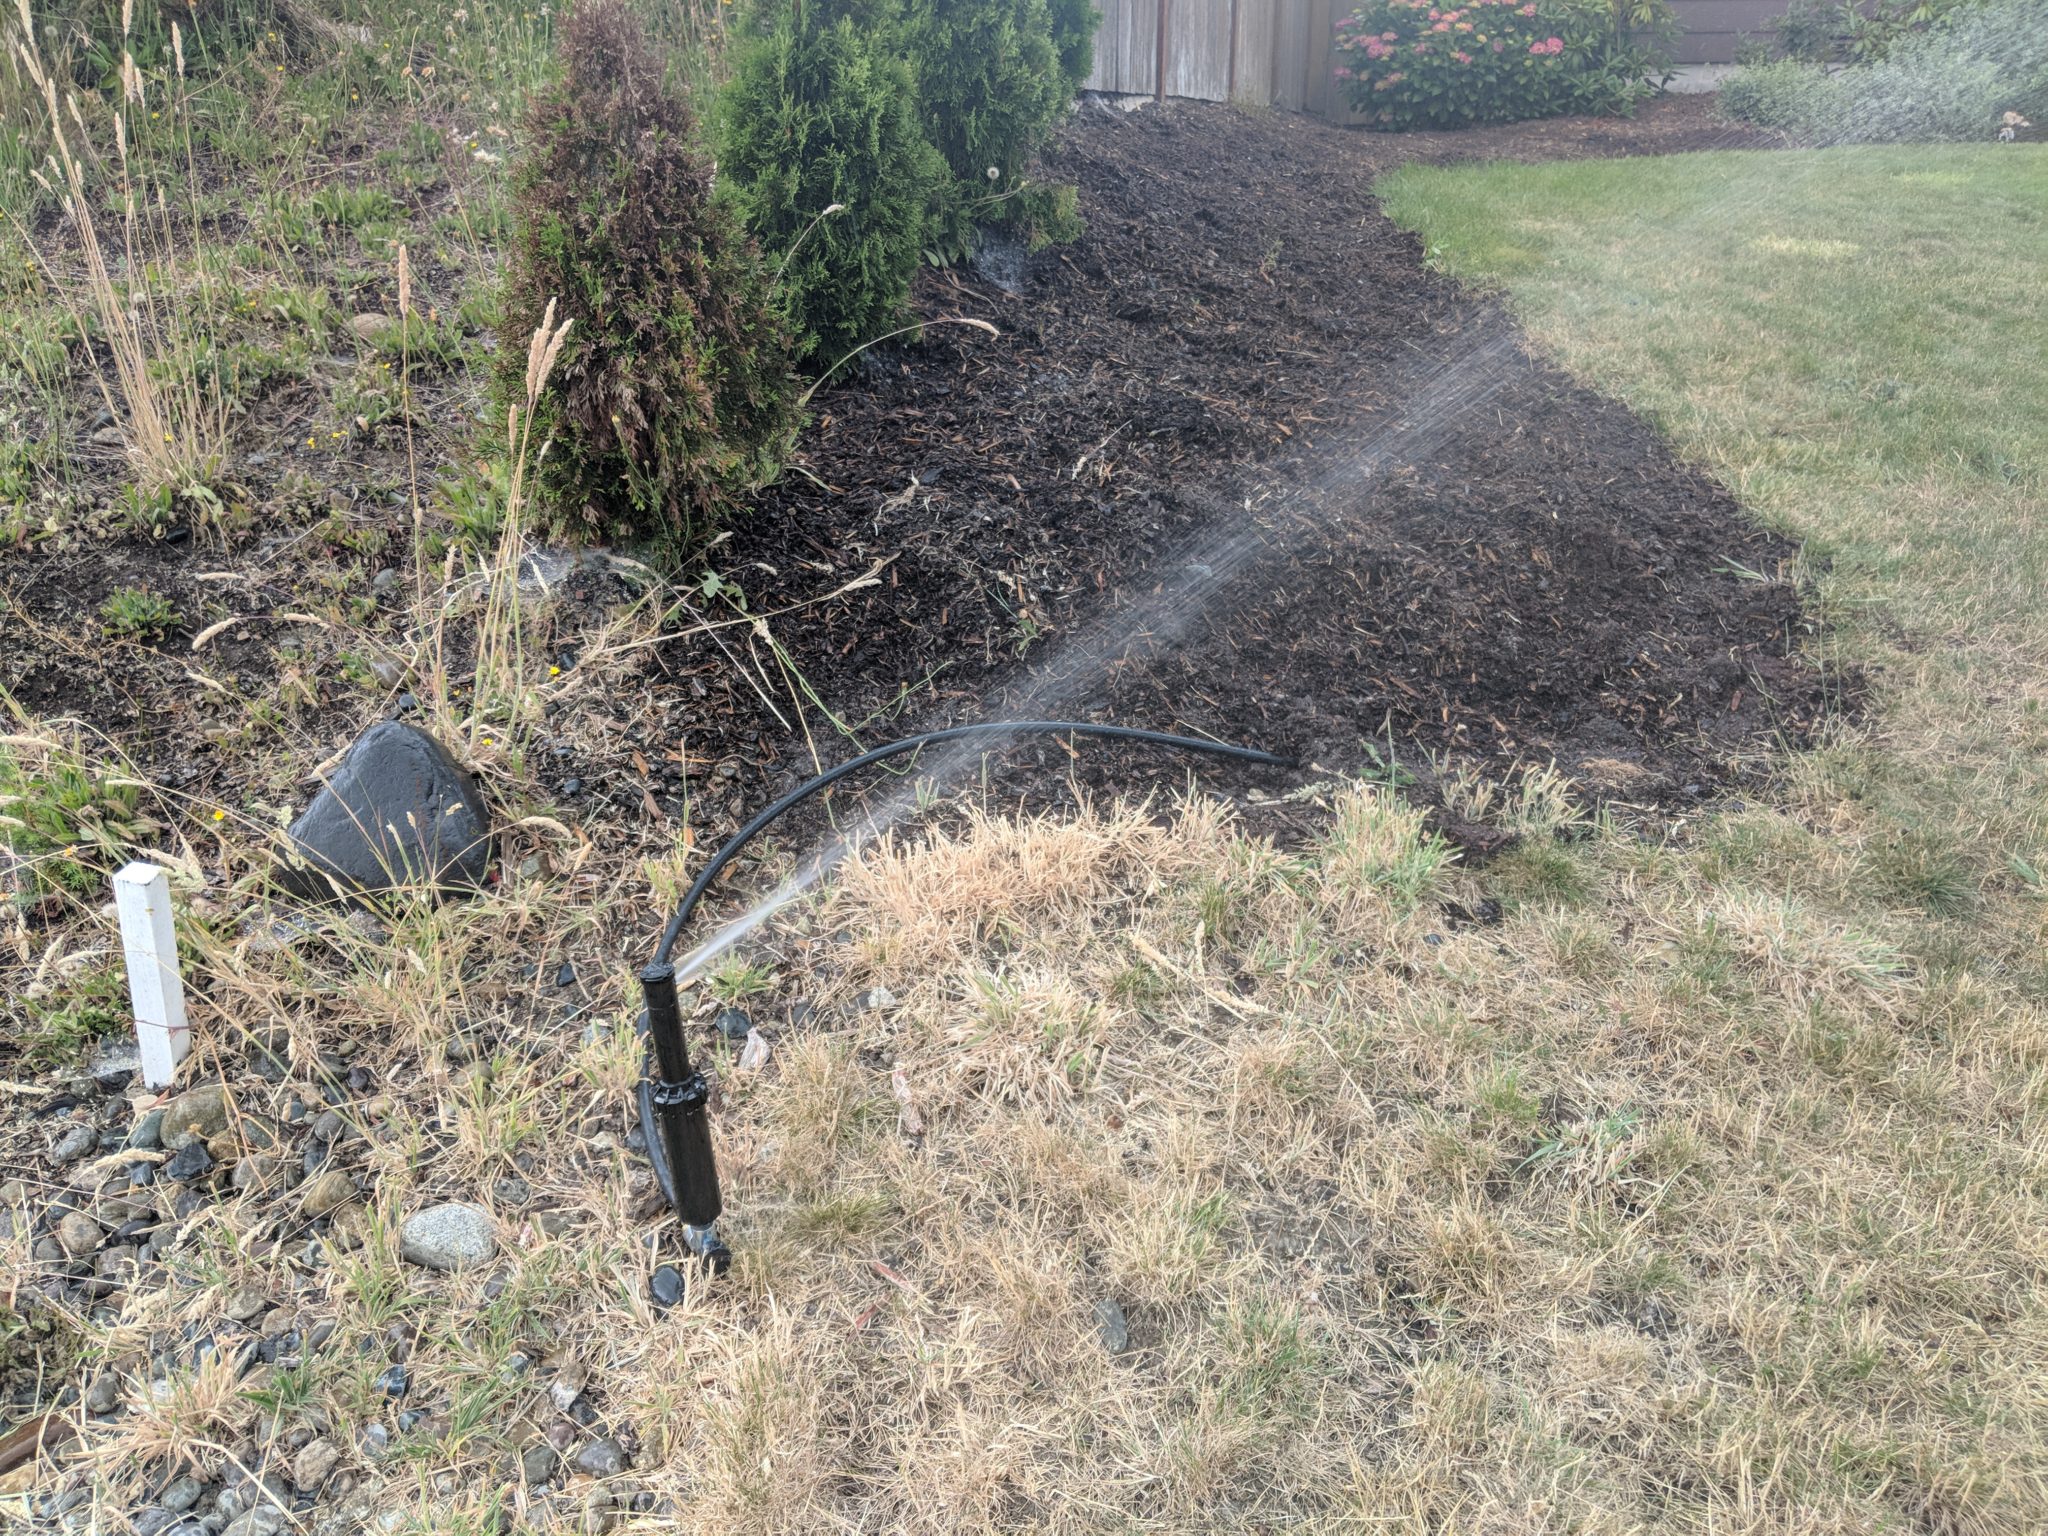
As you can see, this part of my yard is VERY DRY. I could have buried the sprinkler head instead of using another Head Spike, but I did not have the utilities marked so it wasn’t worth the risk.
Although, I do plan to come back later in the season and bury the pipe.
Total Costs:
| (DD) Timer | 1 | $ 93.00 | $ 93.00 |
| (DD) Head Spike | 5 | $ 1.78 | $ 8.90 |
| (DD) Rainbird Rotor | 2 | $ 9.59 | $ 19.18 |
| (DD) Rainbird Tool | 1 | $ 1.51 | $ 1.51 |
| (DD) 1/2″ Straight Barb | 10 | $ 0.26 | $ 2.60 |
| (A) Funny Pipe Roll/Swing Pipe | 1 | $ 33.00 | $ 33.00 |
| (A) GHT Male – 1/2″ Female A | 3 | $ 6.10 | $ 18.30 |
| (A) GHT Female- 1/2″ Female A | 5 | $ 6.10 | $ 30.50 |
| Total: | $ 206.99 |
There may be additional costs especially if you do not have a garden hose, but as you can see the total cost is well below $300.00
If you would like to get a copy of my spreadsheet, that contains links to all of the items in the article, fill out the contact form and send me an email. You can also leave a comment and let me know what you think.
Lastly, if you do plan on purchasing some sprinkler items I would appreciate if you used the links contained in this article. If you do, then I will receive a small commision and will allow me to continue making content. Thanks for checking this article out and I hope you learned something!

