


I love gardening, but what happens to that garden when I go out of town on vacation or forget to water it for a few days? For under $100.00 you can install a fully automatic drip irrigation system. That can be reused and customized season after season.
Why Drip Irrigation?
Drip is the most efficient way to water any plant! Drip irrigation delivers water directly where plants need it the most, at the roots. In addition, water is not wasted by evaporation when it is sprayed up into the air or spread out over areas where this is no vegetation.
Disclosure: All links contained in this article are affiliate links. Which means if you found value in what was covered in this article or this site you can help support what I am doing by purchasing your materials with the links contained below. By doing so, I will receive a small commision based on your purchases. Thank you!
Required Tools
There is nothing that I hate more than reading a DIY article just to nearly get to the end and realize I need to buy some new fancy special tool to do the job. So I am providing my list up front in an effort to prove how easy this is and to stress that anyone can do it.
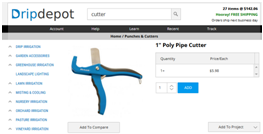
- Tubing Cutters – This will help you tremendously and for under $15.00 it is truly worth it.
- Drill with a 1/8″ drill bit – This is only needed if you decide to go with the flex pipe. You will need to drill out the holes to install the emitters.
- Gloves – A good pair of work gloves will help you out. Especially if you have a lot of plants that require a drip system.
Key Components.
The 3 key components to any automatic system is the water source, controller, and the drip pipe.
- Water source – For this, I will be using my faucet, yes there is nothing fancy. Just an ordinary outside faucet.
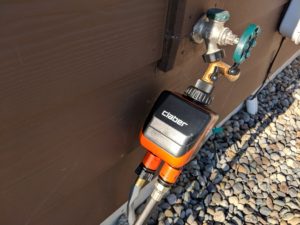
- Controller – A stand-alone timer attached to my faucet will work perfect for this, you can read more about the faucet timer I used here.
- A garden hose – This will be used to carry the water from the timer to your vegetable garden.
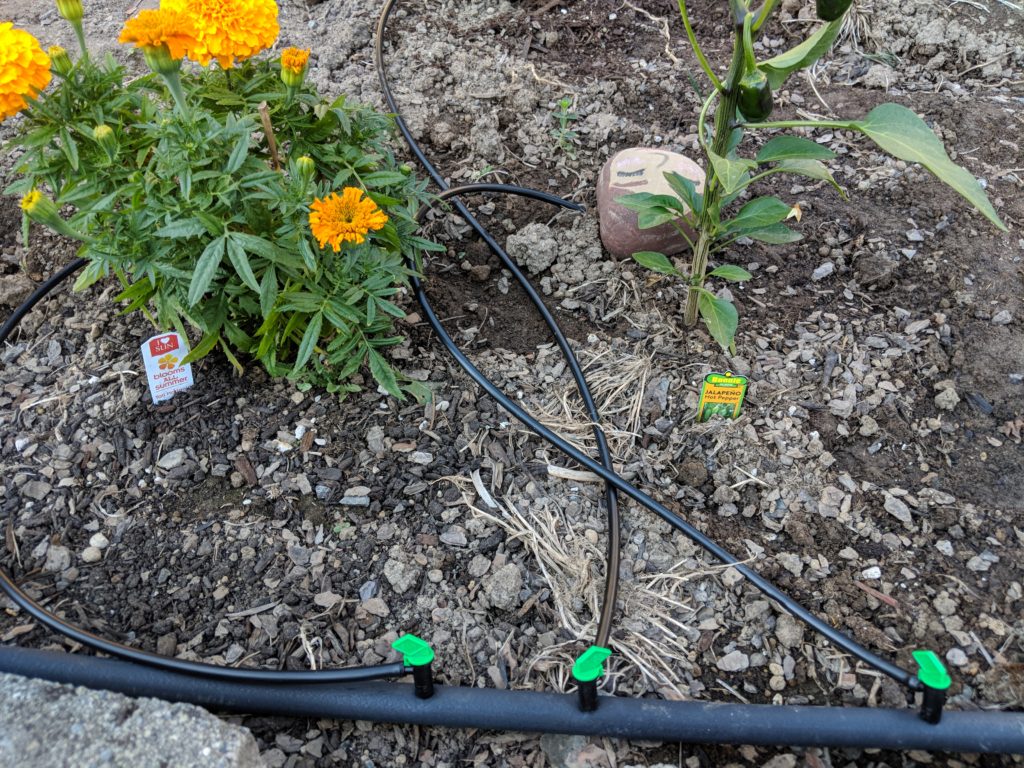
- Flex Pipe – Unlike standard drip pipe, I want to be able to easily add, remove, and relocate the drip system. I will be using the Rainbird Flex Pipe for this.
Flex Pipe Or Drip Pipe
The flex pipe is far more durable than ordinary drip pipe and will withstand a great deal of torture before it breaks. It is more durable, and the fittings stay in longer. Once a barbed fitting is inserted into the flex pipe the only way to remove it is to cut it and strip the pipe off of the barb. Since this system is designed to be reused and customized it makes an ideal choice.
Whats so special about the Rainbird Flex Pipe
Rainbird Flex Pipe is far superior to any other brands. The pipe has a softer feel to it. This allows it to be manipulated easier and it doesn’t retain its memory once unrolled, unlike other brands. Feel free to use any flex pipe you want, but after all of my years installing irrigation systems, Rainbird is my goto brand for Flex Pipe.
Materials
- The Controller – This is optional if you want to manually water your garden or plants, but it will pay for its self the first time you leave the water on all night! If you would like more information in regards to choosing a timer you can check out my Budget Sprinkler System page.
- Garden Hose – You could use flex pipe for the entire installation, but I chose to run the garden hose across my yard, to the first plant. Then I started my Flex Pipe.
- Flex Pipe
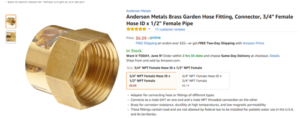
- Fitting to go from Garden Hose Threads (GHT) to Pipe Threads (NPT) – Unfortunately, you will need a special adapter to transfer from your garden hose to the flex pipe like this one
- Barbed fittings to attach the flex pipe – These will be used to connect to the garden hose and to cap off the end of the line
- Drip Emitters – These attach to the flex pipe and let out a predetermined amount of water. That water is rated in Gallons Per Hour or GPH. I tend to stick with 1-2 GPH emitters
- 1/4 Tubing – The tubing will be used to run from your Drip Emitter to your plant. That way you don’t have to weave the flex pipe in and out of your garden.
- Optional Micro-Spray Heads – If you have plants that require “Top Water” like annuals or some flows you may opt to add a micro-spray they are simply a super small spray head.
Installation
Now that you have a good grasp of the materials and what is involved let’s begin the installation of my Low-Cost Drip System.
- Program the controller – Before you install the controller and get everything hooked up it will be a good idea to program it. That way you are not laying on the ground, or fighting to see the display in the bright sunlight
- Install the controller – Simply attach one side of the controller to the faucet and attach the other side of the controller to the garden hose.
- Route the garden hose – Once the garden hose is routed, you can then attach the GHT to NPT fitting and screw in one of your Barbed Fittings.
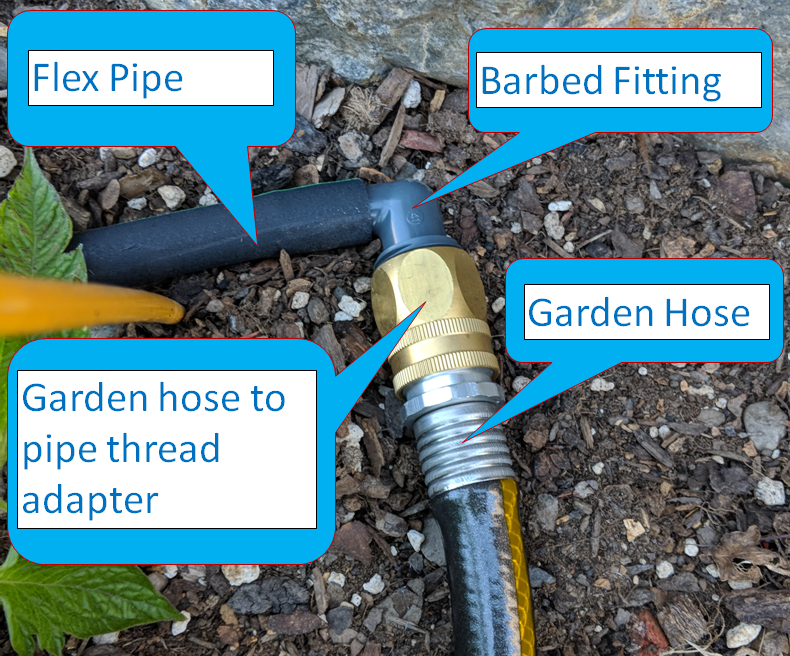
- Attach the Flex Pipe – This can be done by inserting the fitting into the pipe and rock the pipe back and forth while applying pressure to the fitting and pressing in ward.
- Route the flex pipe near your plants – The pipe placement is not crucial, we will be installing a 1/4″ drip line at the base of each plant.
- Locate the placement of the Drip Emitters – Drill a 1/8″ hole into the Flex Pipe. DO NOT DRILL ALL THE WAY THROUGH THE PIPE! The only downside to using the flex pipe is that it is thicker and harder to install the drip emitters. Drilling the holes before punching them in will save you time and your hands!
- Install the Drip Emitters – Press the drip emitters into the Flex Pipe. This will require a significant amount of force which is why the gloves are recommended
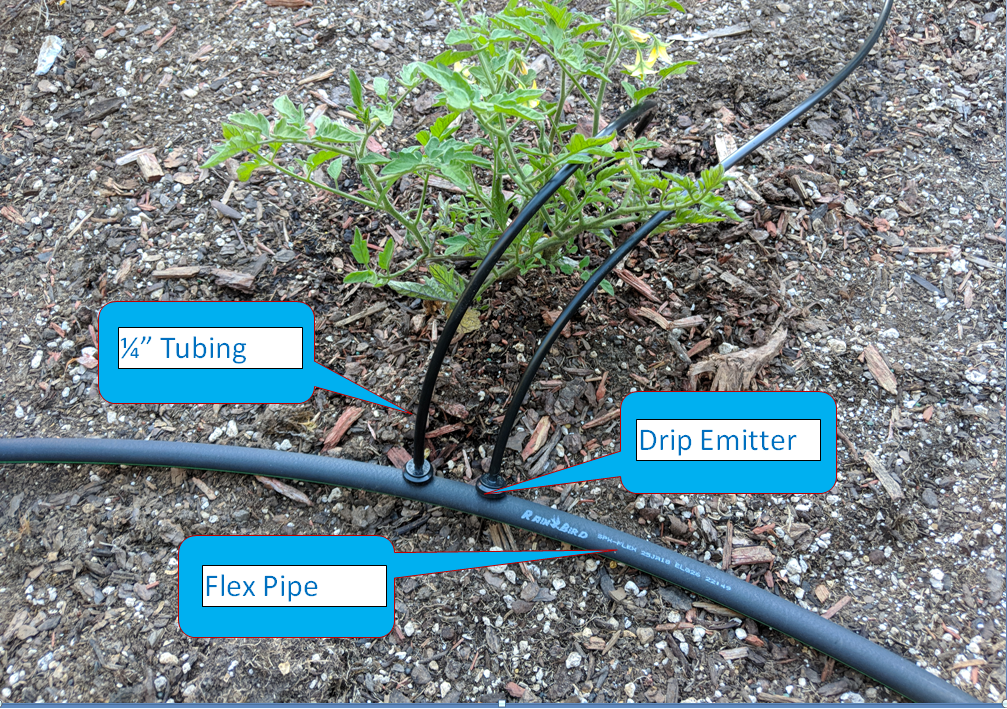
- Attach the 1/4″ tubing – Attach the 1/4″ tubing and route it to the base of the plants.
- Cap Off the Flex Pipe – Once you reach the end of the line, you will need to install another Barbed Fitting and a threaded cap, to cap off the line. Just make sure the cap is the same size threads as the Barbed Fitting you are using.
Easy Peasy!
Drip Irrigation doesn’t have to be super complicated or expensive. It is also very easy to install, let me know what you think. Subscribe and leave a comment below!

